Fivel is my big teddy bear and my dance partner. He is 16 hands 3 inches tall, which for non-horsey people means the top of his shoulder blade at the base of his mane (the hair along his neck) is 5 feet 7 inches off the ground. His is a gentle giant and a total prima dona.
Fivel is totally and completely my horse, although he loves DD too. I have had him since he was born (almost 17 years ago!). He was originally intended as a foal that we would raise, train, and sell. He had other plans. Every time someone would come to try him, he would pretend to be lame and act up. Before and after, he was always right as rain. Some horses are like that though, they find their person and that is that. No one else will do. He loves to dance with me, which means doing dressage to music. He is particularly fond of disco music. ABBA is his favorite. If a song comes on that he doesn’t like or likes he should be moving differently to, he refuses to do what I tell him. (This is why I call him a prima dona.)
DS & DD have both been stuck in the house with ear infections for almost a month. With cold damp air outside, they have not been coming out to do much of the farm chores with me. To help them still feel like they are part of things, I invented a fun game every afternoon when I come in from doing the afternoon farm chores. I started asking the kids a math problem to figure out how many eggs the chickens laid that day. They are competitive with one another so it is usually a race to see who can solve my Eggy Math problem first.
Both DS and DD can do simple addition so that is the type of problem that I give them. The chickens lay both brown and green eggs so my questions are usually something like “I collected 6 brown eggs and 8 green eggs. How many eggs did I collect?” Sometimes I will also ask something like “I have 1 dozen eggs in this carton. Remember that 1 dozen is 12 eggs. I have 4 more in my hand. How many eggs did I get today?”
As the kids’ math competence grows, I can expand this to subtraction. (DS can do basic subtraction in his head but DD still has a little trouble with it. I want to keep our Eggy Math game fair.) “I got 15 eggs yesterday and only 11 today. How many more did I get yesterday?” I can also expand it to fractions. “I collected 14 eggs today and 7 were green. What fraction of the eggs was green?” or “I collected 15 eggs today and we have 22 hens. What fraction of the chickens did not lay an egg today?”
I love math, and so do the kids. Eggy Math teaches them to solve word problems and mental math at the same time!
Here is my favorite recipe for burgers. I call them BBB burgers because I make them with bambi (what we call venison), beef, and bacon. DD, who dislikes ground meat, will actually devour these. This recipe yielded 44 burgers each about 1/4 lb.
Ingredients:
24 oz fatty bacon – ground
3 lbs of 80/20 ground beef
~6.5 lbs of ground venison
Directions:
Preheat oven to 375° F.
Line the bottom pan of 1-2 broiler pans (depending on what you have and how big they are) with aluminum foil.
Mix the 3 ground meats together until they are well mixed. I typically just use my hands.
Pull out large handfuls of the meat mixture and form into patties, placing them side by side on the tray of the broiler pan.
I don’t have a burger press yet but I am hoping to get one soon. Once I get one, I will probably use my scale and make the patties all uniform 1/4 lb burgers.
Once the tray is full, place it in the oven.
Bake for about 30 min or until done.
Use a meat thermometer to be sure that the middle of the burgers reaches at least 160° F.
I am cooking these to go into the freezer, so I want them well-done. If you are going to eat some before freezing, then, by all means, cook them to whatever doneness you prefer. There are many charts available online that provide cooking times for burgers.
Allow to cool, then vacuum seal in bags. Label and freeze. Enjoy in the next 6-12 months.
I usually put 8 in a bag, as that will provide 2 dinners for the 4 of us.
Here is how I make a huge batch of tacos and taco soup in a couple of hours. This yielded about 12 pounds of taco meat and 11 quarts of taco soup. Each of the finished and separated meals described below will usually feed 3 of us for 2-3 meals with an occasional bit left over for a lunch for 1 or 2 of us. (DD doesn’t like ground meat so she typically opts for a cheese sandwich or a soft taco with pepper slices and cheese instead.)
Venison is a very lean meat and you need the fat from the hamburger to help it cook
5 1/3 cups of Ortega Original Taco seasoning (the only one I have found to not bother my onion sensitivity)
12 cups of water
Substitution Option
If you don’t wish to or can’t use ground venison, then you can use whatever split of hamburger you like but I would not recommend going any fattier than 80/20
Taco Soup Ingredients:
1/4 of the prepared Taco Meat
3x 15 oz cans of black beans – drained and rinsed
2x 15 oz cans of white beans – drained and rinsed
I usually use Great Northern for this soup because they are a similar size to the black beans
3x 15 oz cans of corn – do not drain
4x 28oz cans of diced tomatoes – do not drain
petite diced are better than normal diced but either will do
3x 28oz cans of Rotel Original tomatoes and chilis – do not drain
1/4 cup taco seasoning
3 bay leaves
Kitchen Supplies
To handle this massive cooking task you will need:
A large stockpot – mine is about 12 quarts
A large skillet for cooking the seasoned meat – mine is 12 inches
If you don’t have anything that big, then use a large pot like a dutch oven or just use the stockpot again
I prefer a skillet because my current stockpot isn’t lined on the bottom and tends to burn easily
2 9×13 pans or dishes lined with a double layer of paper towels
These are for draining the meat
I use 2 large pyrex lasagna pans
Kitchen Scale
Bag holder – I got some off of amazon and they make a huge difference
Vacuum seal bag rolls – large and small
I make the large rolls into 4 bags about 2 ft long
I also double seal the bottom of the large bags, because I have had soup leak out of them before – it made a huge mess!
I make the small rolls into 6 bags about 1 foot long
Vacuum sealer – like a food saver
A 1-quart measuring cup
I use one of those twisty storage containers. The larger of the 2 sizes sold in most grocery stores is 1 quart.
You could also use a measuring cup – 1 quart = 4 cups
Step 1: Cook the Taco Meat:
Put 3 pounds of the hamburger into the stock pot
Cook on Medium-Low (about 4 if your stoves has numbers) until the meat is cooked through, stirring/mashing regularly to break the meat up into small pieces
Once the meat is cooked, use a slotted spoon to dish it into one of the 9×13 pans – leave all the fat and drippings in the stock pot
Repeat with half of the ground venison
Repeat with the other 3 pounds of ground beef – this time using the other 9×13 pan
Repeat with the other half of the ground venison
Remove stock pot from the heat – once it cools a little drain any excess liquid in it into a disposable container – We keep things like old yogurt tubs or spaghetti cheese containers around for this kind of thing
Add approximately, 1/4 of the meat to the skillet
Be sure to get a mix of both types. Don’t just scoop from the top
Add 1 1/3 cups of taco seasoning and 3 cups of water
Stir and cook on Medium-Low stirring occasionally until the sauce begins to thicken – about 5-10 min
Repeat 3 times for the rest of the meat
The stock pot keeps the splatter contained while the meat is cooking.
Here is half of the cooked meat draining.
By the time I was done making the taco meat, I had used almost 3 1/2 tubs of taco seasoning!
If you are going to continue and make soup:
Add 1/4 of the taco meat and all of the soup ingredients to the stock pot
Cook on Medium-Low until it starts steaming, then reduce heat to Low (2 if your stove has numbers)
Allow soup to cook for 3-4 hours, stirring occasionally to be sure nothing is sticking and burning to the bottom of the pot
Remove bay leaves before eating or preparing for the freezer
Yummy!
Steps for freezing all these meals:
For the Taco Meat:
Place bag holder on the kitchen scale
I use to just eyeball but I have found that meal planning is easier when I have a better idea of how much meat is coming out of the freezer.
Fold the sides of a small vacuum seal bag back about 1 1/2 inch so they stay clean – this makes a big difference in how well it seals
Place the vacuum bag on the bag holder, adjusting the height as necessary
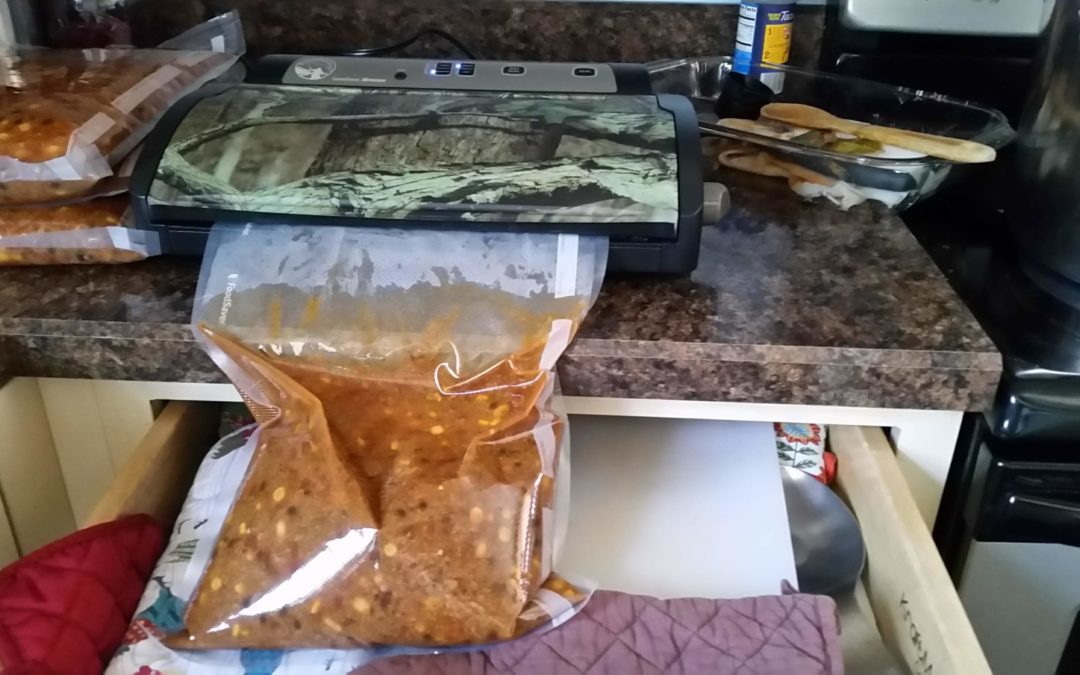
Here is how I vacuum seal soups in bags to go in the freezer:
1. Use the large bag rolls.
2. Make the bags at least 18 inches long.
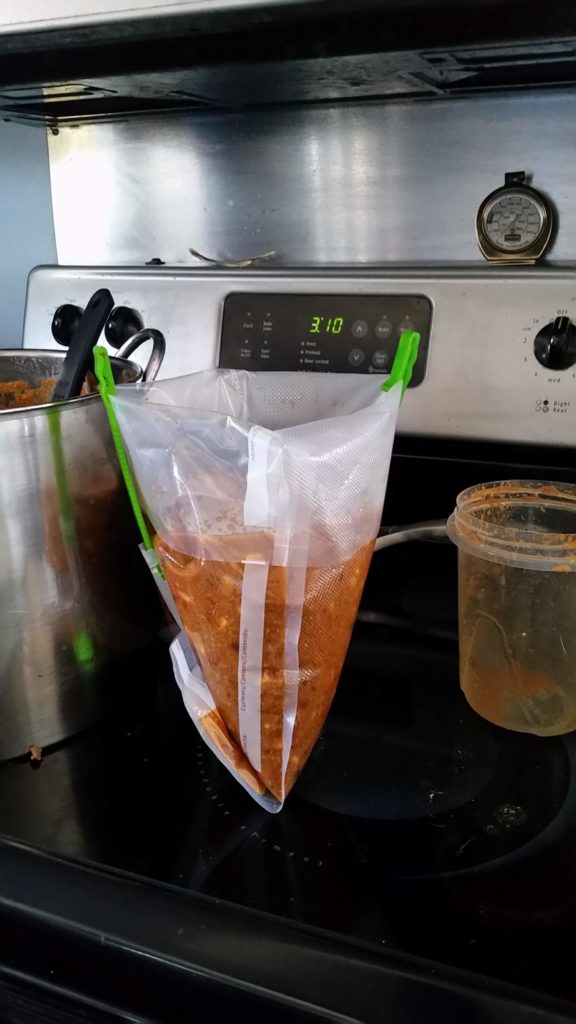
3. Double seal the bottom of the bag. I had a seal fail once, and it made a huge mess when I went to move the bag to the vacuum sealer! I had to move the stove out and clean puddles of soup out from under it.
4. Use a bag holder while you are filling the bags and fold the sides of the bags back about 1 1/2 – 2 inches before you place it on the holder.
5. For an easy way to monitor how much soup is going into each bag, ladle the soup into a 1 quart container. Then pour it into the bag. I use one of those twisty food storage containers. This also seems to minimize splash.
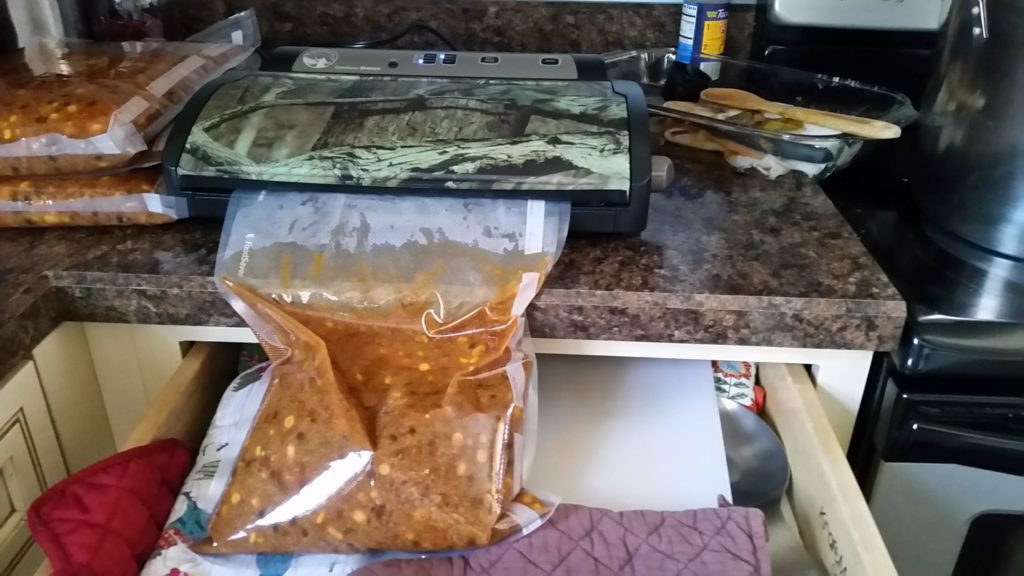
6. Find a space of counter that has a shallow drawer right under it. Place the vacuum sealer a couple of inches away from the edge of the counter. Place the bag of soup into the drawer and then place the open end of the bag into the vacuum sealer. This allows the vacuum sealer to do its job and keeps the soup from spilling in the process.
7. Once you start the vacuum sealer, watch VERY carefully. As soon as the top goes flat and the liquid from the soup starts to get sucked up the bag, press the “SEAL” button to stop the vacuuming process and seal the bag.
8. Double seal the top end of the bag to protect against leaks.


Recent Comments